How to Link iPOSIM to POSIM
This article will outline the steps necessary for linking iPOSIM to POSIM.
- Ensure you meet the iPOSIM system requirements. (Link)
- You will need to purchase a mobile seat connection and have POSIM authorized to use mobile seats. Contact your sales rep for pricing and authorization.
- Turn on iPOSIM Services.
Launch POSIM and go to Administration>General Preferences>Extensions.
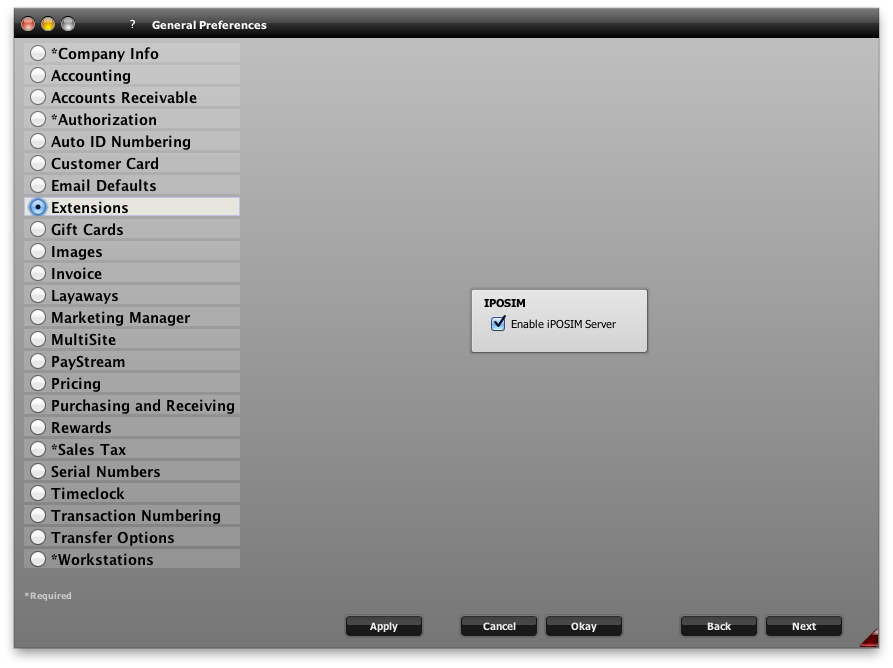
- Check the box “Enable iPOSIM Server” and then you will need to restart POSIM.
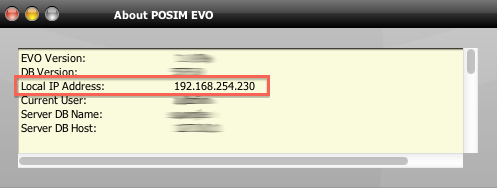
- Find this computer’s IP address. The easiest way is to click the “V” icon on the POSIM navigator. There is a line that says “Local IP Address” You will use this IP Address in step 8 below.
- On your mobile device, download iPOSIM from the App Store (Link)
- Launch the iPOSIM app and you will see the following.
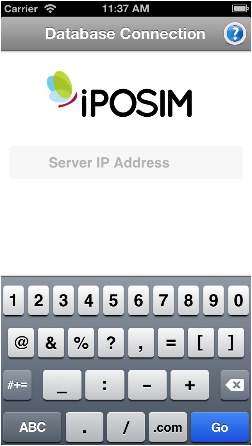
- Type the IP Address you found in step 5.
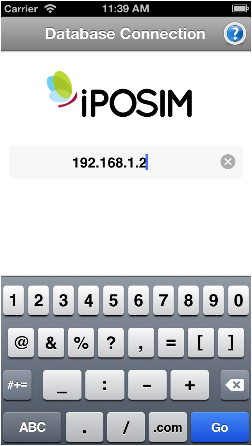
- Tap GO. As long as the IP Address is correct and POSIM is running you will see an employee login screen.
NOTES:
1. POSIM needs to be open for iPOSIM to connect.
2. For instructions on how to use iPOSIM click the “?” icon found in the App.
3. iPOSIM is only supported using the same local network that POSIM is on. Click here to view the remote connection options.