Assigning Web Categories in POSIM
This article discusses how to sync web categories from Magento 1, Magento 2, or Zoey into POSIM and assign them to specific items. Web categories create the main navigation layer for items on the website, and for an item to show on the customer facing side of your website, it must be assigned to at least one web category.
Web Categories are created in the website admin panel, not in POSIM. To create a new web category, go to:
Magento 1: Catalog > Manage Categories
Magento 2 and Zoey: Products > Categories
This will allow you to create categories which will help organize how your items display on the website.
Syncing Web Categories into POSIM
Any time new Web Categories are created or existing Web Categories are edited, they will need to be synced into POSIM. To sync categories in POSIM, go to Administration > General Preferences > e-commerce and click the Sync Categories button. If web categories are not synced, new and altered web categories will not appear in POSIM and items cannot be assigned to them.
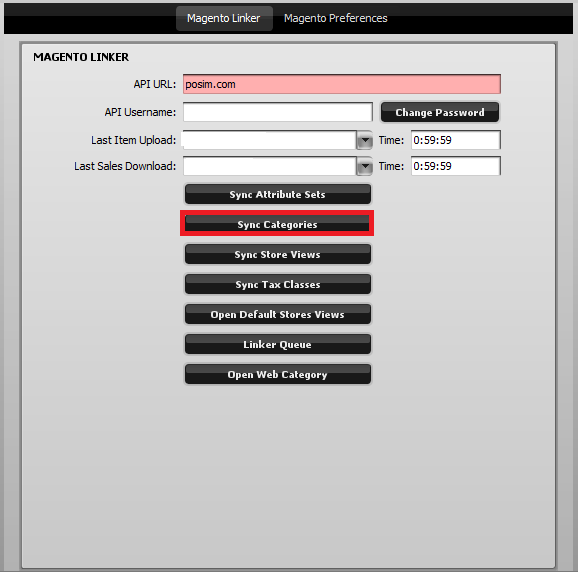
Note: The e-commerce tab is generally a hidden tab in General Preferences and can be found by going to *Workstations and clicking Next.
Once Web Categories have been synced into POSIM, they can be seen in General Preferences> e-commerce by choosing the Open Web Category option. Each web category card shows a list of items are assigned to that web category.
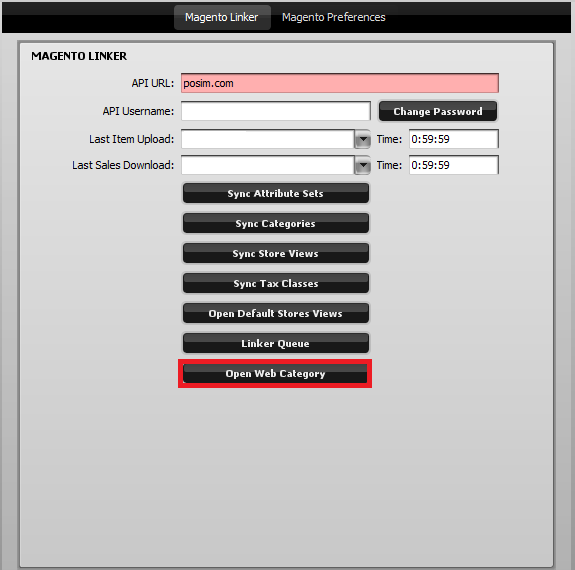
Click Open Web Category to display current web categories in POSIM.
Assigning Web Categories to Items
There are three ways to assign Web Categories to Items in POSIM.
- Import Items (spreadsheet import – .xlsx or .xls)
- Load Items (advanced search window)
- Item Card (by individual item)
Assigning Web Categories via Import
Items can have Web Categories assigned to them with a spreadsheet import. This can be done in POSIM through the Tools > Import Items button on the Web Category Card. This works much like POSIM’s Import Manager utility with an Excel-style import. Recommended spreadsheet format types are .xlsx or .xls.
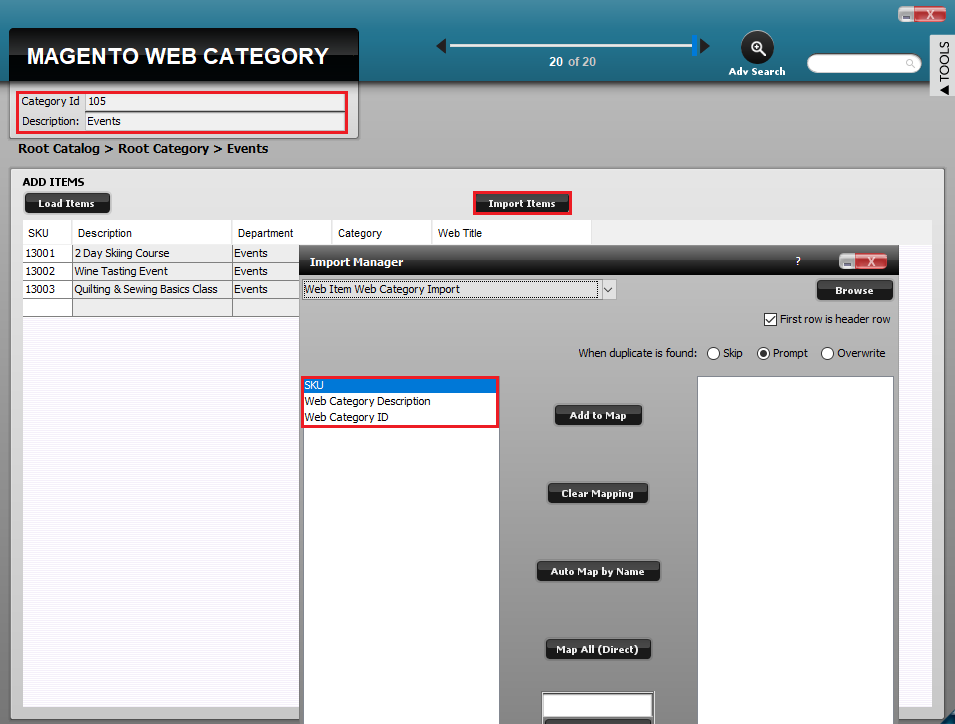
Importing items to web categories.
For a correct import, the spreadsheet needs to contain 3 columns: SKU, Web Category Description (Found on Open Web Category card), and Web Category ID (Found on Open Web Category card).
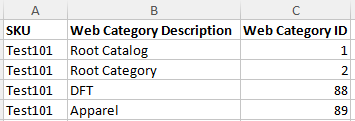
If an item is going to be assigned to multiple web categories, it will need to appear on the spreadsheet multiple times. The same SKU can be repeated, one SKU per line and one category assignment per line. Once the import completes successfully that item will be assigned to the designated web categories.
Assigning Categories via Load Items
Items can also have web categories assigned to them through the advanced search look window by using the Load Items button on the web category card.
To add items to the displayed web category, select Load Items and use the advanced search to filter which items to add to the web category list. Items with multiple web categories will need to be loaded individually into their respective web category cards. The next time the linker runs it will assign items on the web category lists to the corresponding category on the website.
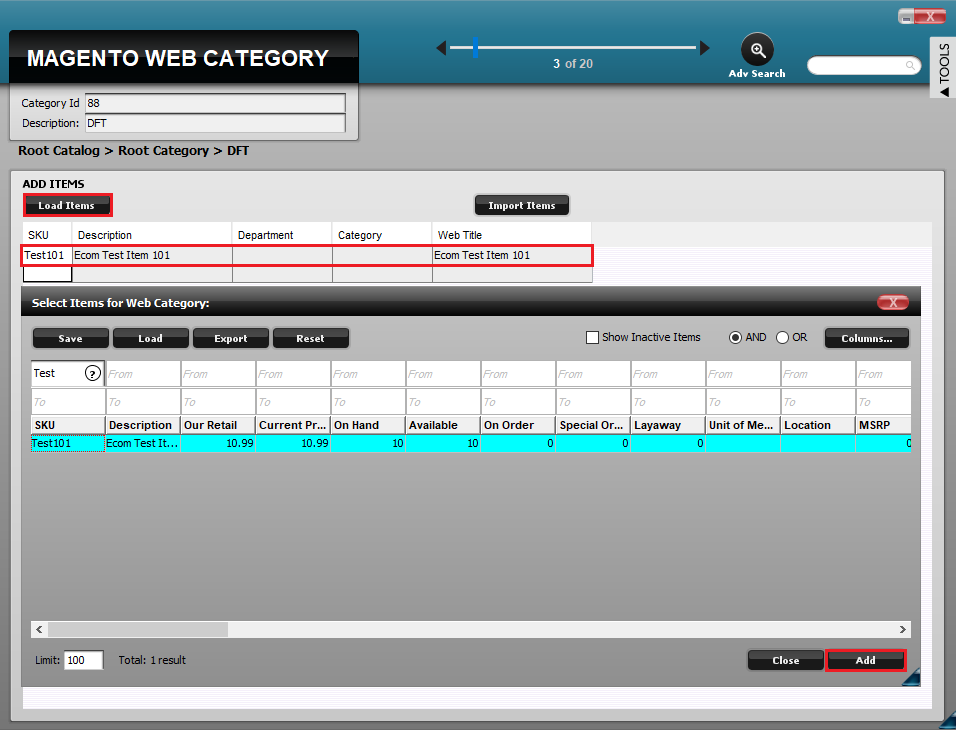
Click Load Items and use the search window to add items to a web category.
Assigning Web Categories via the Item Card
Lastly, web categories can be individually assigned to an item directly from the POSIM item card by clicking on Web Category under the item’s Web tab. A category path will appear, which allows you to check and uncheck the web categories this item is assigned to. Click save to save changes when finished, and the category changes will reflect online the next time the linker runs.
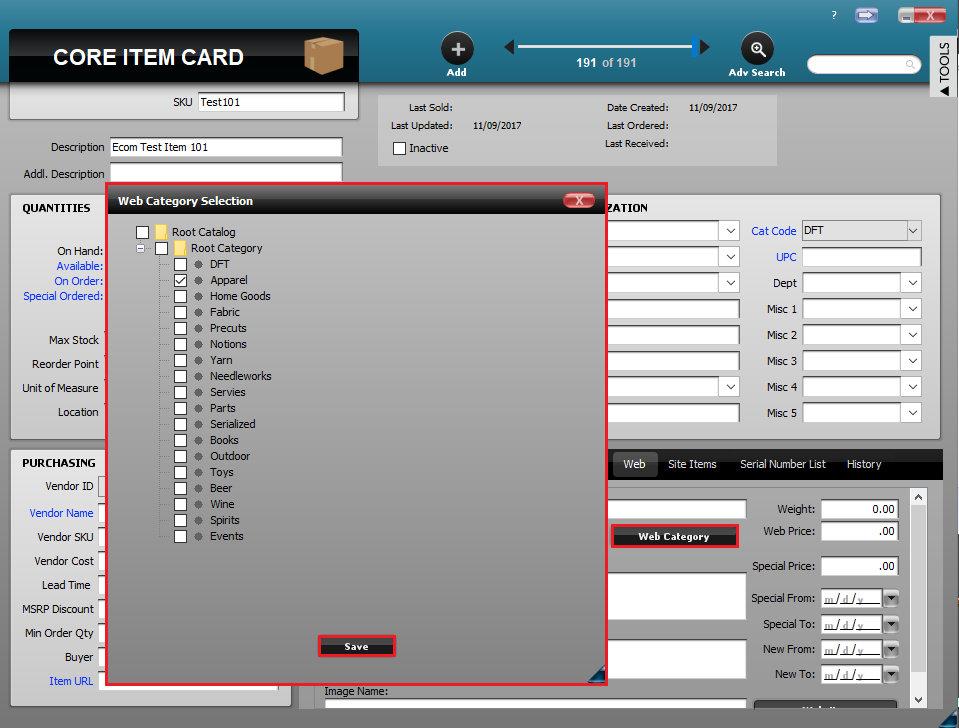
Click Web Category on an item card in POSIM to check and uncheck this item’s web category assignments.
