Long Receipts Cutting Off in Windows
The following information represents a quick guide for Windows users on how to adjust long receipts cutting off. For questions or assistance with long receipts cutting off in Windows, please contact support@posim.com or call 800.553.9314 to speak with a tech support representative.
Long Receipts Cutting Off in Windows
For Windows users, printer settings can be configured to print a specific length of paper and then automatically stop printing or cut the receipt. For POSIM users, this means that receipts could be cut off early and not include all the necessary receipt details. This article will guide users through the process of configuring printer settings to prevent long receipts from being cut off.
Open the Devices and Printers panel on the computer. The steps to access the Devices and Printers panel will vary depending on the Operating System being used. Below are two common options:
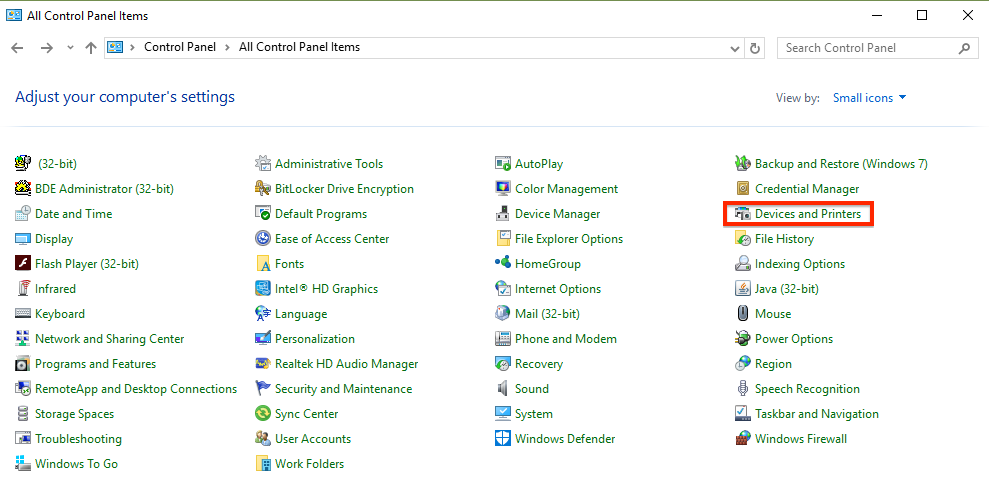
Option 1: Using the Control Panel
Click on the Start Menu and locate the Control Panel. From within the Control Panel, double click on “Devices and Printers.”
Option 2: Search the Start Menu
Click on the Start Menu and begin typing “Devices” into the search box.

When “Devices and Printers” appears in the menu, single click on the icon to open.
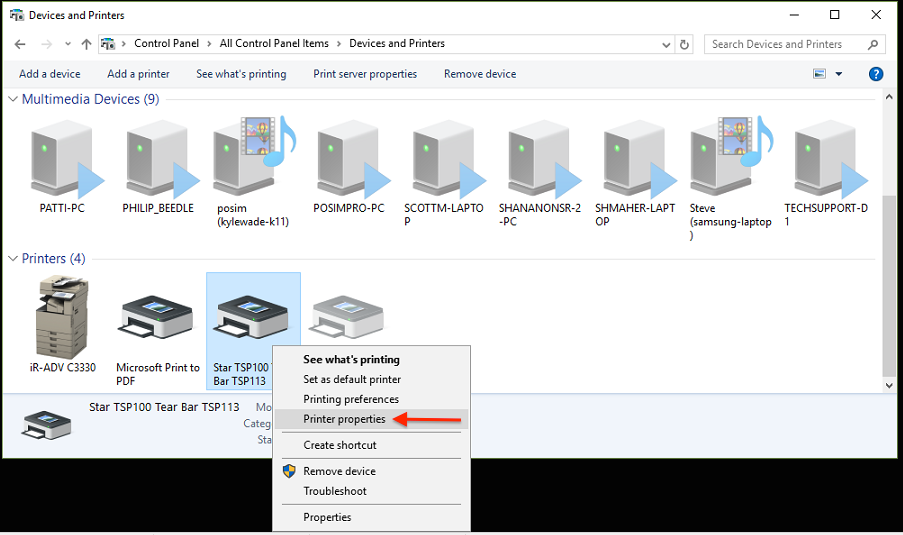
Inside of the Devices and Printers menu, right click on the printer icon for the Star TSP100 Printer and select Printing Preferences.

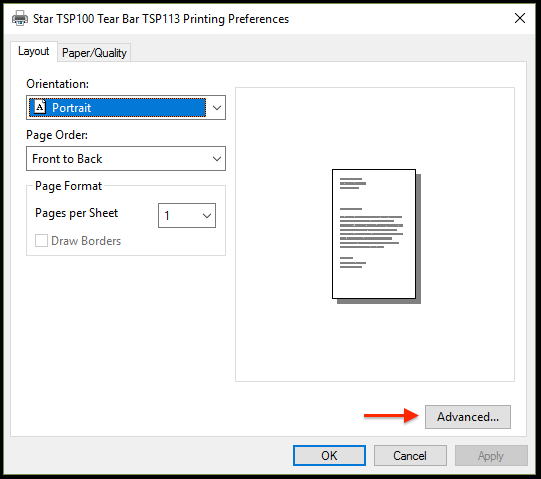
The Printing Preferences window will appear. From the bottom right corner, click on the Advanced button.
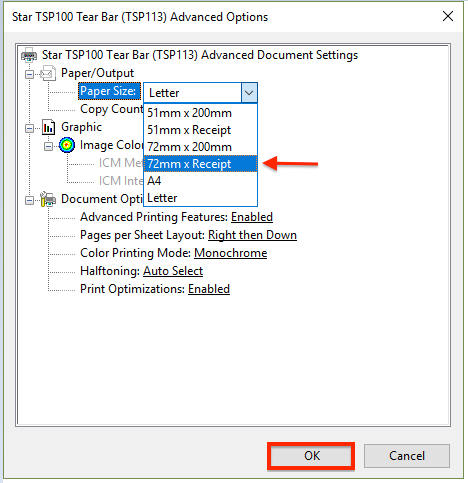
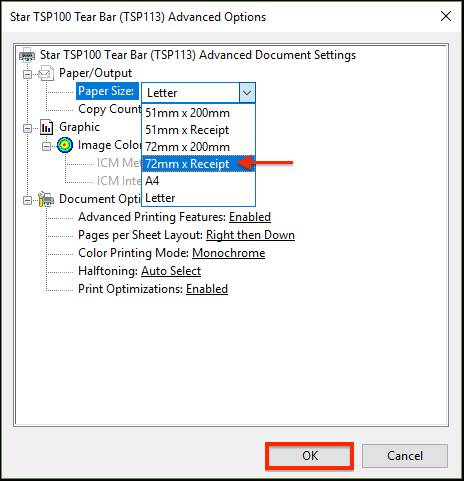
Under the Paper/Output options, click on the drop down menu and choose “72mm x Receipt” as the paper size and then press OK.
The Printing Preferences window will remain open, press Apply and then select OK to save the changes.

Go back into the Controls panel window, right click on the printer icon for the Star Tsp100 Printer again, but this time click Printer Properties.
When the Printer Properties windows appears, click on the “Advanced” tab at the top and then click on the “Printing Defaults” button in the lower left-hand corner.

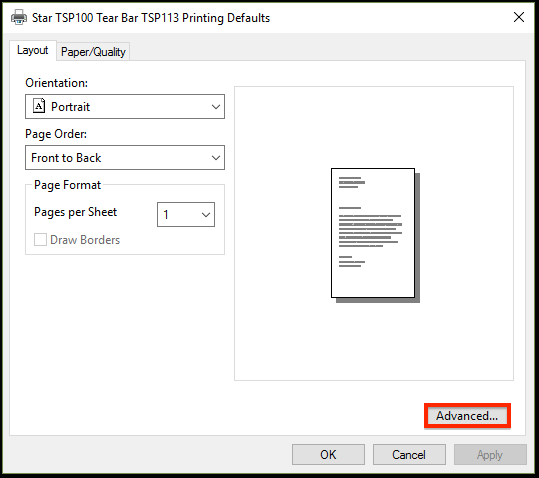
Inside of the Printing Defaults window, press the Advanced button located at the lower right corner.
Under the Paper/Output options, click on the drop down menu and choose “72mm x Receipt.” as the paper size. Press OK to save the changes and close the window.
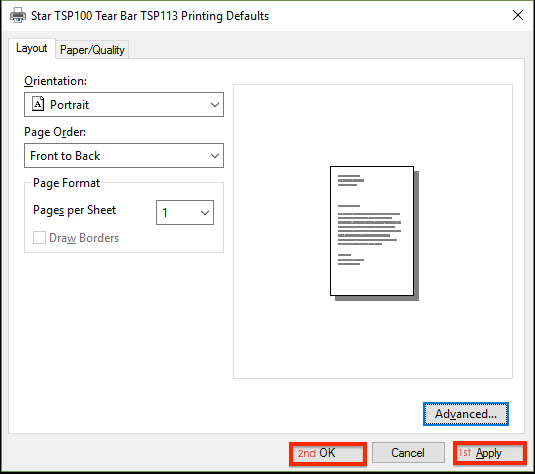
The Printing Defaults menu will remain open, press Apply and then press OK to close the window.
The Properties window remain open, press Apply and then press OK to close the window.

Now you have successfully changed the printer settings to print long receipts.