POSIM Reward Points Setup
This article covers the reward points system within POSIM and how to utilize it.
1. To begin setting up reward points, access the rewards preferences by navigating to the rewards section of general preferences.
2. If rewards have not yet been enabled, the screen will look similar to the screen below:
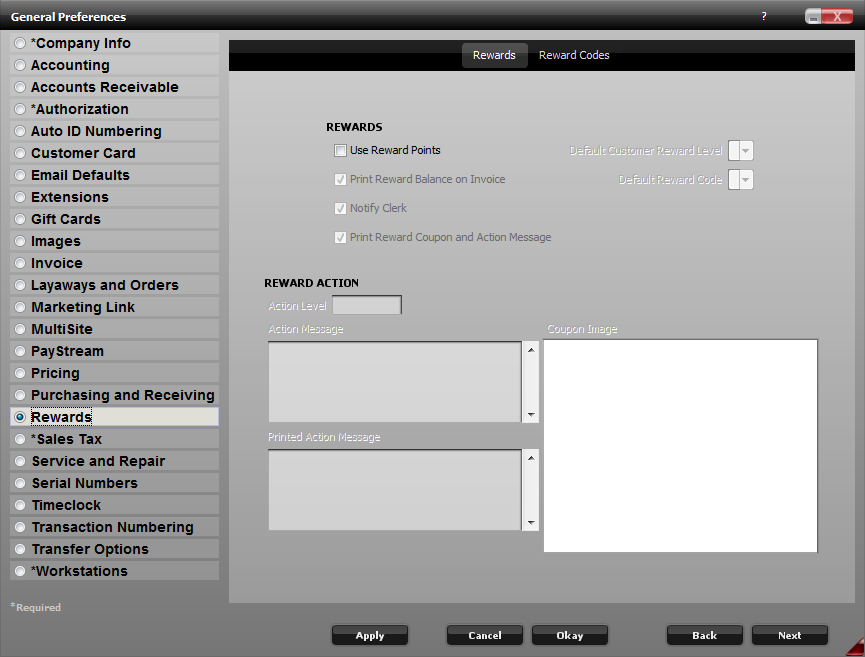
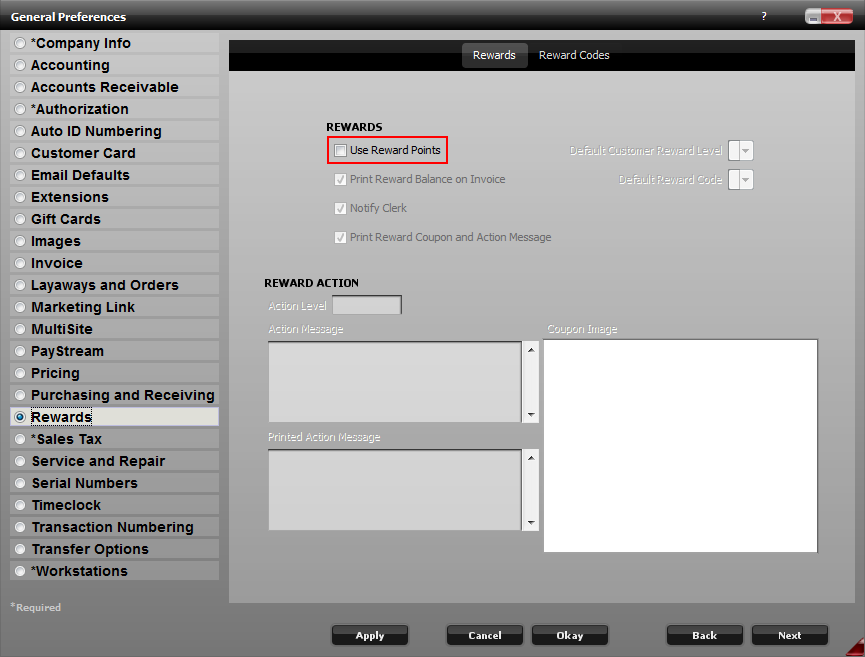
3. Check “Use Reward Points” to enable POSIM’s rewards system and allow the creation of reward tiers. After enabling reward points, additional options will become available, which are detailed below.
– Print Reward Balance on Invoice will print the accumulated reward totals on receipts and invoices.
– Notify Clerk will cause a message to pop up when an invoice is posted with a customer that has accumulated a reward point total greater or equal to the specified action level.
– Print Reward Coupon and Action Message will print the “Printed Action Message” and coupon image on receipts and invoices.
– Action Level defines the number of points required before a customer will be able to redeem them.
– Default Customer Reward Level and Default Reward Code are the defaults that will be used when new customers or categories are created.
– Printed Action Message is printed on receipts and invoices when points are redeemed.
– Coupon Image is an image that prints on receipts and invoices that details the actual reward.
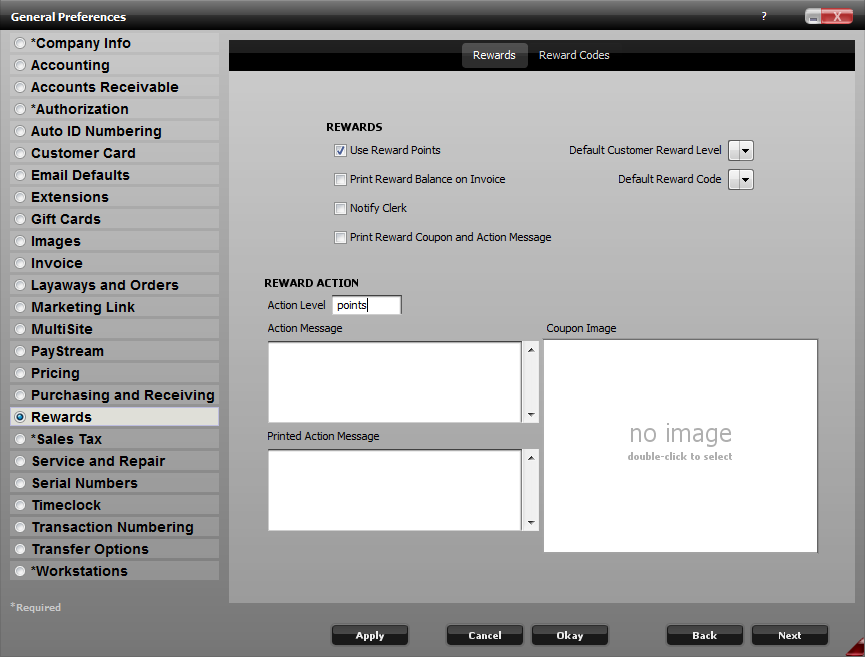
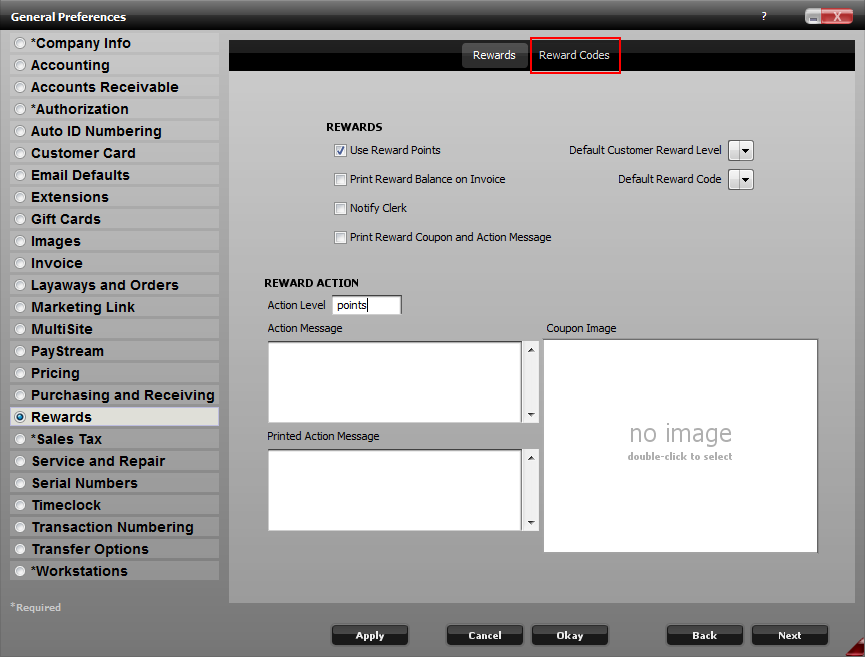
4. Click on the reward codes tab as displayed in the screenshot below. This is the screen where the calculations for earning reward points are set. There can be multiple sets of reward codes, but only one set of reward levels. Each reward code can have its own reward level definitions applied.
5. To create the initial reward code, click the add button and type a name in the reward code box. A description can also be assigned, but it is not necessary. It can be beneficial to add a description if there are multiple reward codes defined.
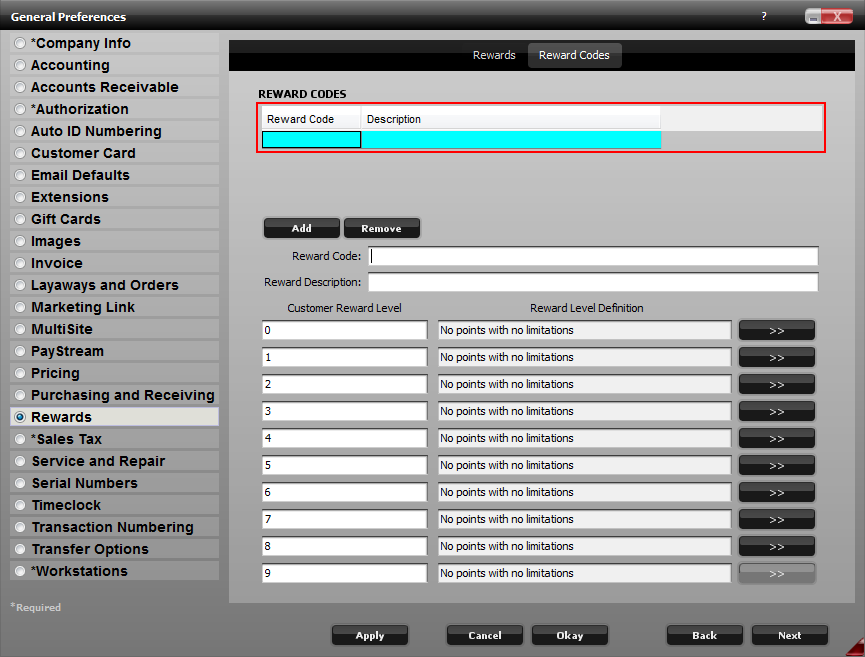
6. Once a reward code has been added, the reward levels can then be defined.
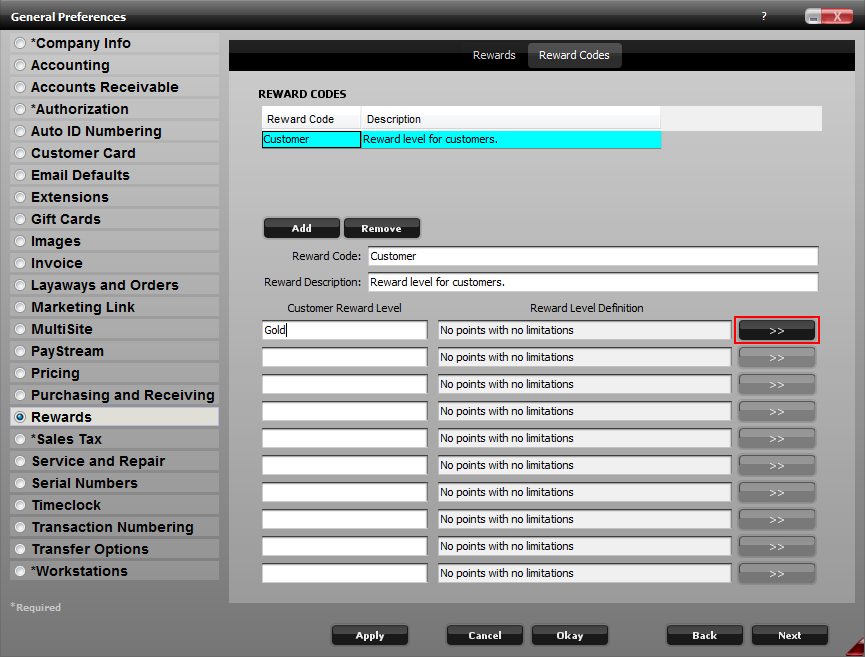
Name each level by entering a title in the customer reward level box. Then click the “>>” symbol.
7. The Reward Code Definition box is where point calculations are defined. There are two methods for accruing points: quantity and sales price.
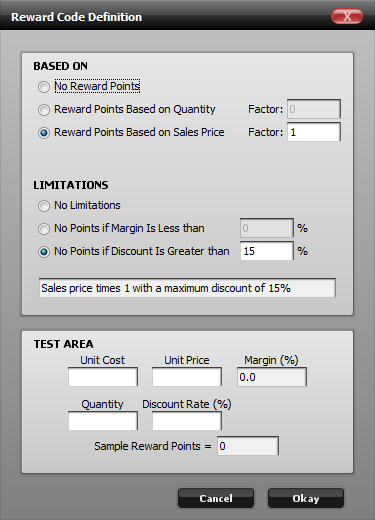
Below that, there is a section for limitations, which is able to be used to prevent point accrual when margins dip below a certain percentage or discounts go above a certain percentage. The test area is used to test the point accrual methods to ensure that if the margin or discount percentages are being met, they are implemented properly.
8. When the definitions have been created, click Okay to save them to the database for use.
9. Once reward codes, levels and definitions have been completed, there are two additional pieces remaining before reward points can be awarded. Reward points must be set per item category and reward levels set through the customer card. These values can be set individually, or for multiple customers or categories at a time with grid view or import manager.
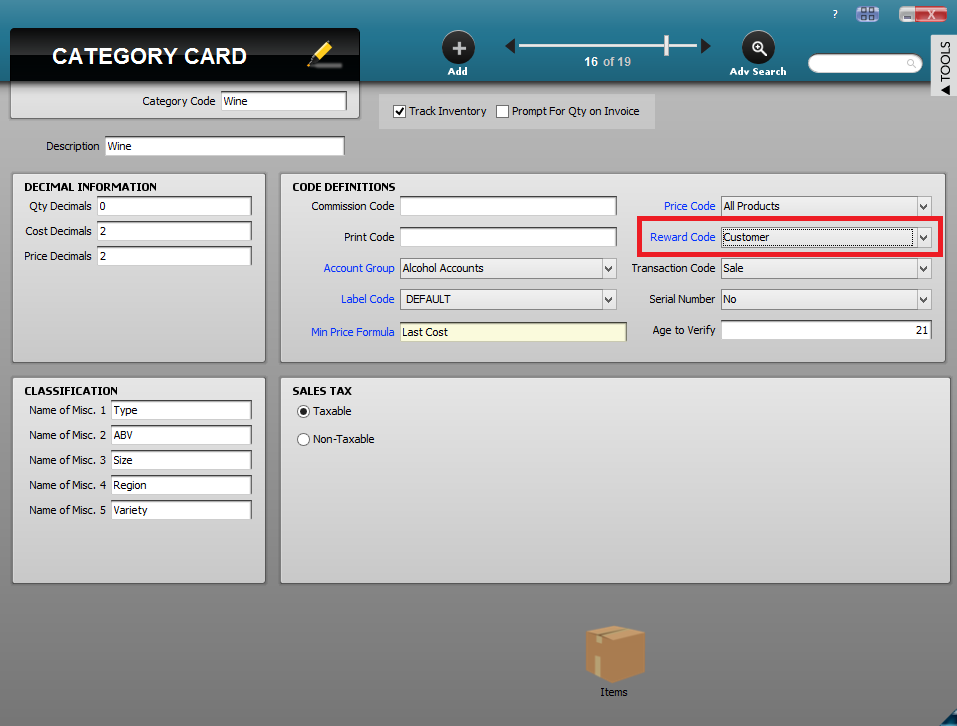
Use the reward code dropdown on the category card to make items in that category reward-eligible.
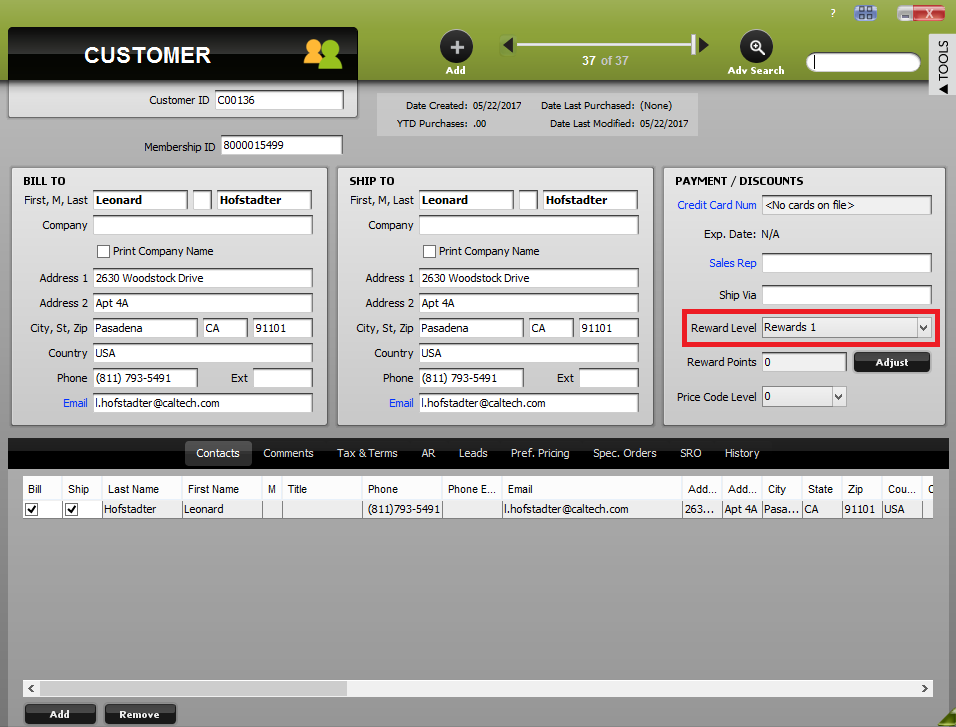
Use the reward level dropdown on the customer card to specify a reward level for the customer.
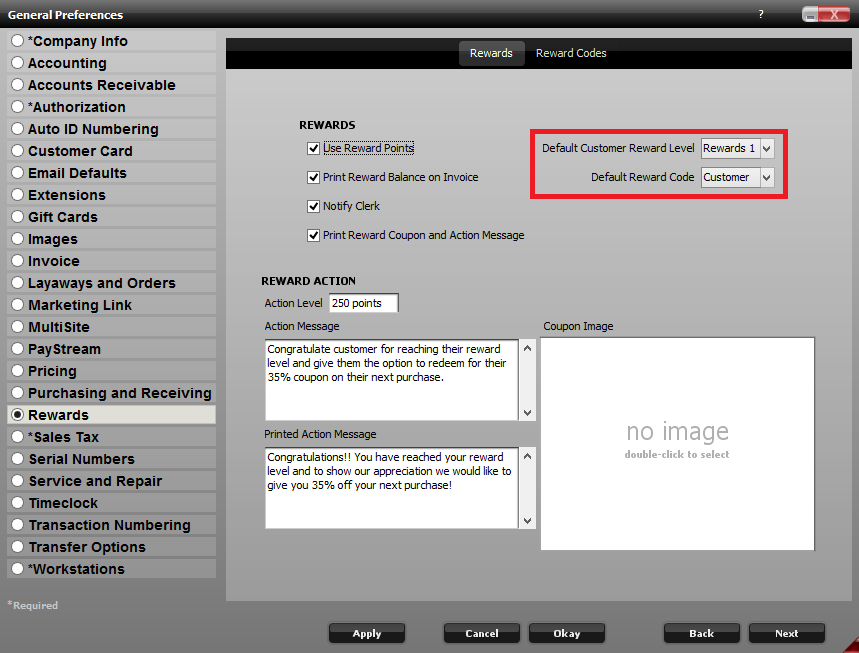
Specify default reward levels for new customers and reward codes for new item categories in the rewards section of general preferences.
